|
|
|
|
|
|
Chris finished the ride. I made my way home by Pierce County bus and bumming a ride from a friend. I spent the next few weeks shopping for a new bike. I checked out folders, recumbents, electrics. I eyed a tandem... how cool would that be? Wow, they start at $2000.
Finally, I decided that I liked my Softride so much that I'd just buy a new frame from the factory. I had Speedy Reedy move my headset, bottom bracket, and beam to the new frame, and I put everything else on. After a nearly complete dis- and re-assembly, I felt quite empowered -- bike repair isn't even a little scary.
Thoughts drifted back to that tandem. I started reading a bit about tandems on the web, and came across Sheldon Brown's Homebuilding a Tandem page. Hey, why stop at putting components on a frame? Why not stitch together my own frame?
I was sitting in a boring meeting one afternoon in August, 2006, and I ended up doodling around with the build-your-own-tandem idea. I drew these sketches:


There wasn't much there on my first visit, but even if there would be, I needed to know that I could finish the job with parts. I went inside Recycled Cycles, and found the bins: stems, $5. headsets, $5. Handlebars, $5. Cranks: $10 Bottom brackets (behind the counter): $10. Shifters, $5. Brakes, $5. Seatposts, $5. I got the idea: If I couldn't find what I needed on the free rack, I could finish with parts at $5 apiece.
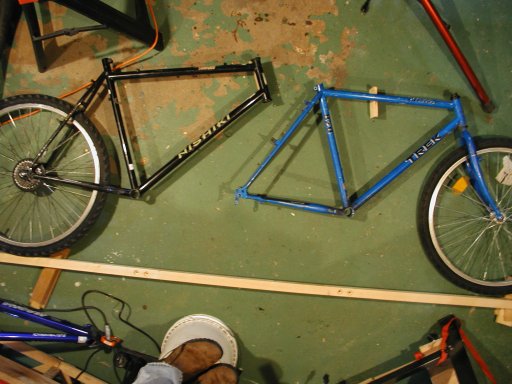
A future trip to the free rack turned up a Nishiki frame with a servicable set of cranks on a nearly-siezed bottom bracket. It was a big 22" frame, perfect for the bigger rider (me). I also hauled home Magna, Greatland, and Huffy frames.
I decided that I should probably try to buy a batch of parts in one shot, just to make it easier to get matching ones. I bought a 20" Trek 820 from Craigslist for $80. I should have checked it more carefully: the Doofus owner had replaced a roller in the chain with a nut (!), which had destroyed the entire drivetrain. I did use the frame, fork, stem, and wheels (after replacing a broken spoke), brakes, derailleurs, and levers.
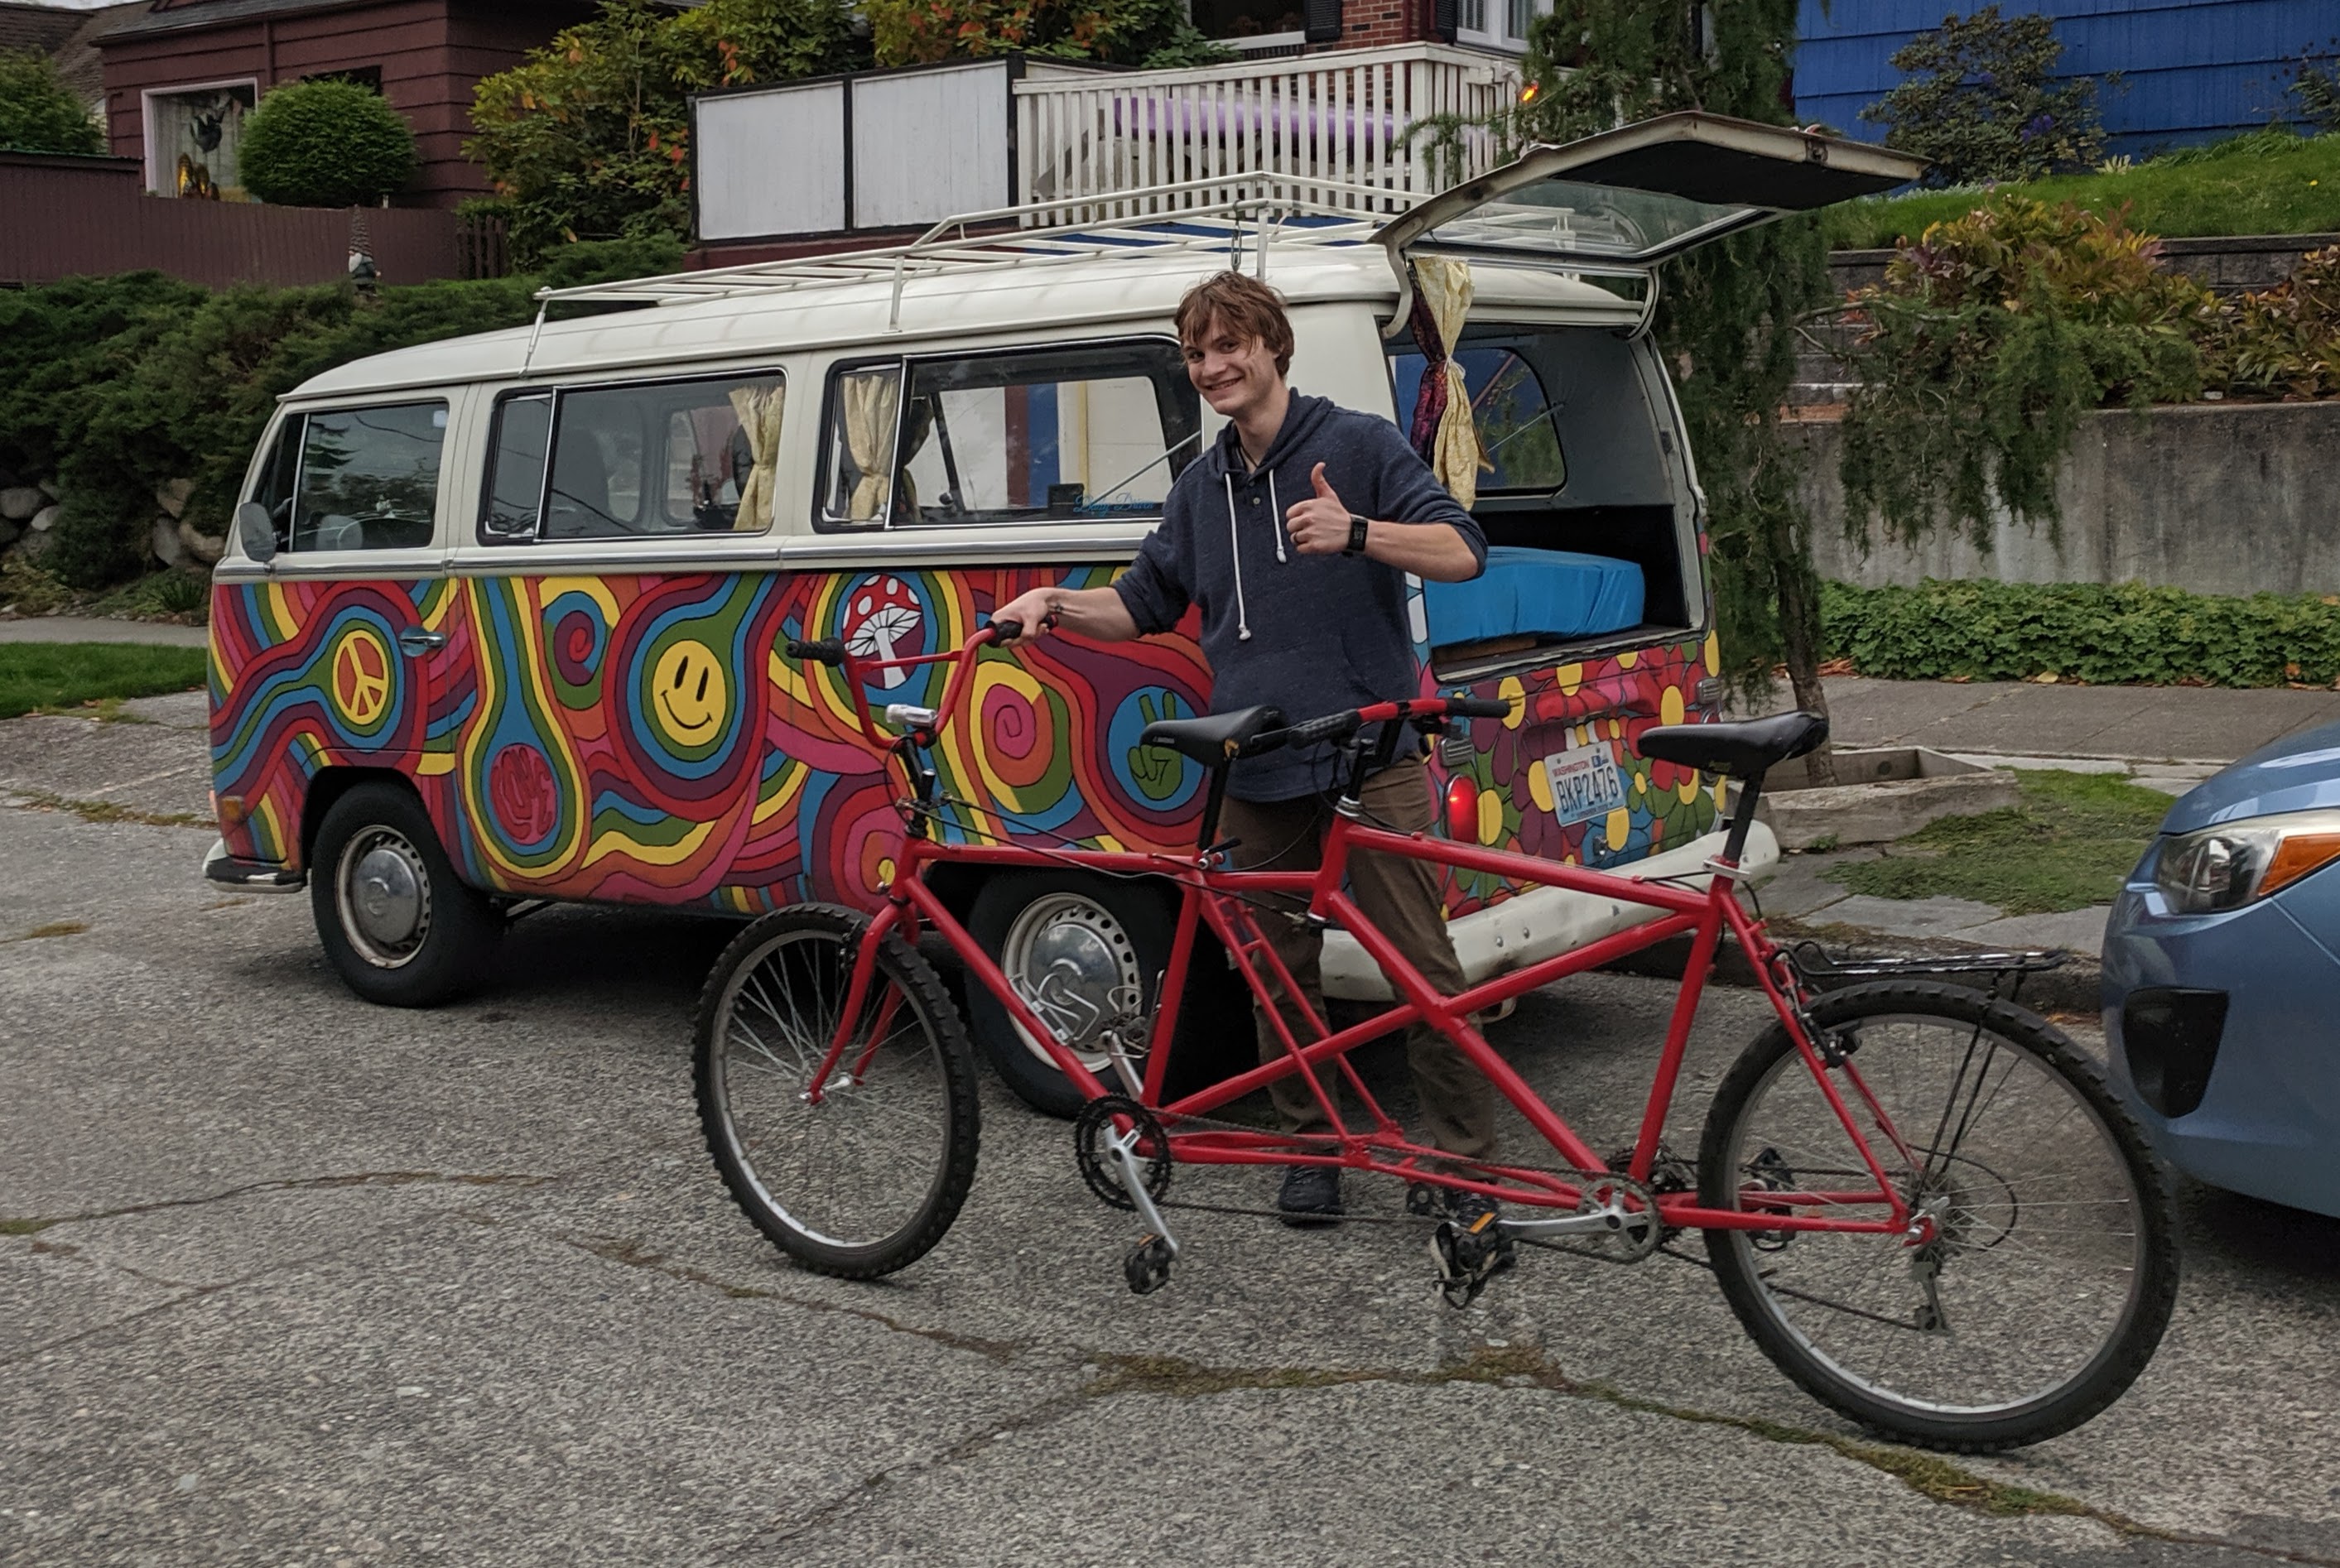
I laid my bikes out on the shop floor in about the right place and took a photo, over which I sketched the additional frame members I would add. The front frame was the Trek 820 (Frame #1), and the rear frame the Nishiki (Frame #2).
In retrospect, another crucial design consideration for my proposed rear steering was that the head tubes should be close to parallel. Luckily, they happened to end up about right, and the multi-axis rod-end bearings made up for any difference.
|
|
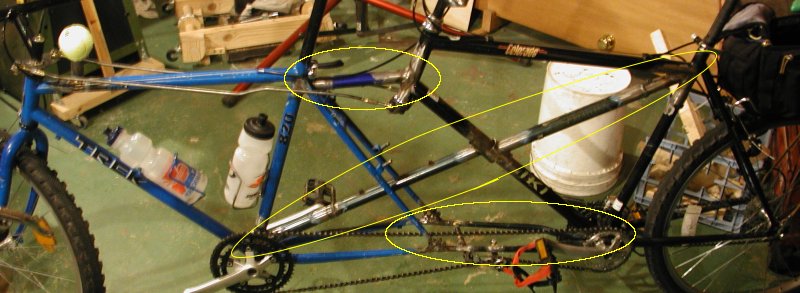
Assembled frame. Top to bottom, yellow ovals identify top joint, diagonal tube, bottom joint. |
I expect that tube to carry a compression load. (Notice here that I'm trying to sound like a mechanical engineer. I'm not. I'd be delighted to know whether my wild guesses were right, ideally before the bike breaks in use.)
I expect the bottom member to carry a tension load: The wheels push up on the ends of the bike, and the riders push down in the middle, so the wheels want to move away from each other.
I have no idea whether this member is compressed or tensioned. Maybe it depends on the relative weight of the riders.
Note that in four places (both ends of the top connector, and the far ends of the diagonal member) I really did have to fashion my own round-to-round joints. I still have no idea how to do this correctly. What I did in fact was grind away the ends of the joining tube until it mostly fit in the right place, grinding and fitting repeatedly. With time, this got easier, as my grinding wheel took on the radius of a bike tube.
This meant that it was difficult to precisely control the length of the final result. I did the top connector first, so its length didn't much matter. For the diagonals, each half is actually two telescoping tubes. (Happily, Frame #4 included two sizes of tube that nested well together.) I ground the difficult half to fit, then nested the tubes, placed the whole assembly, and extended the tubes to fit snugly. In retrospect, this worked out pretty well: it let me arrange the tubes to snuggle right into the corners of the main frames.
The next step was to actually weld the parts into one frame.
I read that someone had succeeded in performing some bike welding using the Mapp-Oxy kits from Home Depot ($50 kit); their only complaint was that you go through oxygen bottles ($8) quickly. I tried using one of these kits to braze some scrap, and in the 20-minute life of the oxygen bottle, I couldn't get a consistent-enough flame long enough to make the work piece hot enough to braze. It was infuriating. I took the whole mess back to Home Depot.
The next weekend, I priced out 115V stick welders at Harbor Freight and Home Depot ($100-300). Then I went down to Central Welding Supply in Fremont to return unused goggles and flux. For yuks, I asked what the cheapest welder they had was, and they pointed out the Lincoln 135ST MIG welder, mine for mere a $489. I hesitated quite obviously. The Central guy said, "well, you could go get a cheapie from Home Depot or Harbor Freight, but it's just going to drive you nuts..." Okay, I'm inclined to believe him: the last one did! But no way I can part with $500 for a goofy project like this.
It turns out, though, that Central rents the same welder: $40/day (I finagled the weekend as a day), plus $20 for a tank of Argon/Nitrogen, and another $20 in consumables (welding wire and tips). You should understand that I have a whole few hours of welding experience behind me: I managed to get by my four-week gas and arc welding class in high school, and more recently, my father-in-law taught me to braze. The Central guy assured me that I'd really love the MIG welder.
I came home, plugged that baby in, and set to work on my practice piece. After about three minutes, I was producing almost pretty beads along straight joints. (As it turns out welding over braze metal doesn't come out so well.) In just a couple hours, I had the frame together. I really did love that MIG welder! It was like a magic marker for steel. The most challenging joints were between 1/8" thick and 1/16" thin tube (see below), and even those I worked out very quickly.
Wow! The big question (can I build a frame?) is answered! I tossed it into the trunk, and joyfully headed down to Recycled Cycles to pick out parts to install. I got there an hour before closing. Shido and at least two other shop guys helped me pick out a seat post, a bottom bracket, a headset for the rear bike ("say, how do these threaddy things work?"), a set of cranks, and some handlebars. I bought new three chains and a set of cables.
One helpful staffer started clipping cable housing to fit, and got a couple cut too short before I realized he was measuring to the front handlebars. I explained my wacky plan to his surprise. He even taped all ten pieces to the frame so I could remember which was which. The bike got a lot of appreciative (and other) looks. Shido hefted it and said "boy, that's heavy -- I mean, solid!"
I went home and test-fit stuff all night. The angle grinder got pretty toasty as I flattened off the weld near the rear BB opening and cleaned off other messes. I still had the welder for another day, so I spent Sunday preparing the parts for the remote steering.
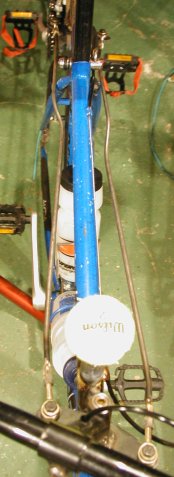
The rods attach to the levers via Wicks MM-4 rod end bearings. The inner race of these clever bearings are spherical, so besides the required rotational freedom, the bearings allow the rod's vertical angle to vary by a few degrees. This has the benefit of covering over remarkable amounts of slop in construction, and even accomodating slight nonparallelism between the axes of the two headsets.
|
|
Front lever plate. |
|
|
Front lever plate, front view. |
|
|
Connecting rods. |
|
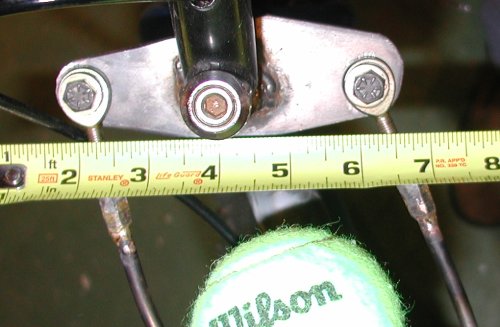
| Rear lever plate, at the bottom of the rear head tube. |
The rods are bent out to go around the front seat stays, back in to stay as close as possible to the front top tube (since the front rider's legs have to move around there), and at angles at each end to position the rod end bearings parallel to the lever plates. I wasn't excited about weakening the rods by bending them, but in practice, I don't feel any mush in the steering, even bouncing over curbs. (A nice thing about the simple coupling is that it would be straightforward to replace the rod connection with an alternate design. A boating friend suggested push/pull cable.)
At the ends of the rods are two 3/4" 1/4-28 threaded couplers. Each is drilled out halfway to 1/4", and brazed onto the end of a rod.
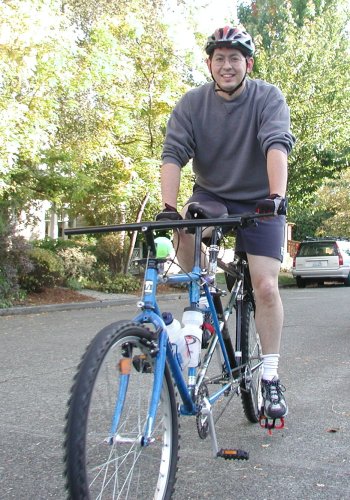
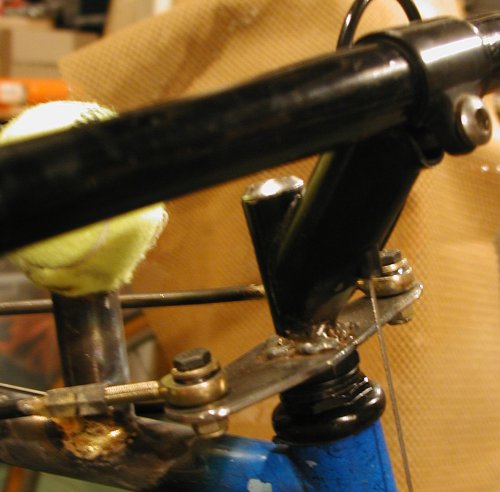
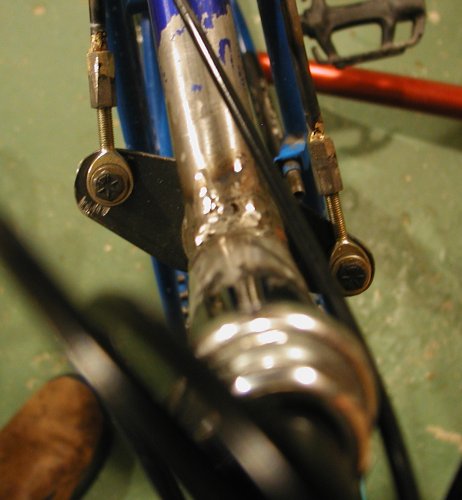
The lever plates are rhombuses cut from 1/8" soft steel bar from Home Depot. Yeah, waaaay too thick. 1/16" with a stiffener wrapped around the outside would probably have been just fine. Each has a big hole drilled in the center (7/8" in the front, to mate with the stem; 1" in the back, to accomodate the steer tube), and two 1/4" holes drilled to provide a 2" lever arm.
The front lever plate is welded onto the front stem, high enough that there's plenty of stem left to insert into the front steer tube. The rear lever plate is welded to the bottom of another threaded steer tube from which the fork was removed. Not quite that simple, really: I couldn't find a long enough steer tube for the rear head tube. So I had to assemble a longer one by taking two pieces from two salvaged forks and coupling them with another tube inside. I got the welded plates pretty darn close to perpendicular to the tubes using a right-angle welding magnet ($3.99 at Harbor Freight).
Projects for the weekend:

|
|
Modified rear stem. |
|
|
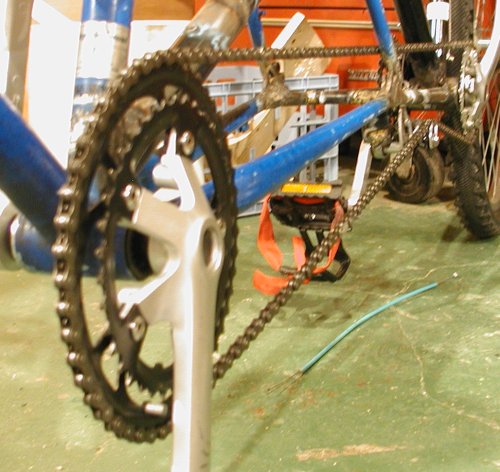
Synchronizing chain.
That front chainring is not just bigger due to perspective, it's really a bigger chainring. |
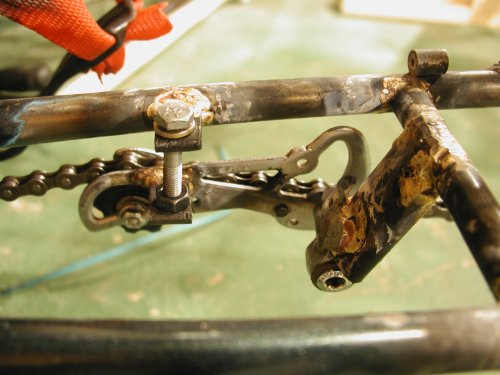
One trick for the homebuilt tandem is providing chain tension. Sheldon's cheapest suggestion is the idler pulley, so you can guess what I chose. I cobbled way too much steel into place to hold a salvaged derailleur spring and pulley assembly to serve as the idler pulley. This was a bad idea for several reasons. The first one I noticed was that with the pieces brazed in place, I couldn't tension the spring in the derailleur as I installed it.
The second problem made the first one moot: a spring-loaded idler doesn't work! Unlike the coupling to a freewheel, the two riders can load the chain in either direction. When the front rider stopped pedaling and I continued, the bungee that replaced the un-tensioned spring loaded up, and the chain slackened and jammed or fell off. I added still more steel to install an adjusting screw, and now I can set the chain tension rigidly.

|
|
| Idler pulley assembly, view from left. | Idler pulley assembly, view from right. |
It's still not ideal, because it makes an awful lot of rattle as the chain rides through. I'm not sure why. The pulley is probably too cheesy; I should probably use a real sprocket on a bearing.
If I were to do this again, I think I might consider some wacky arrangement in which the front rider's bottom bracket is mounted independently from the frame, enabling its position to be adjusted up to half an inch front to back; sort of a poor-man's eccentric bottom bracket.
Dick and I lumbered down the street for a few houses, made a crazy turn
through the neighbor's loop driveway (and their lawn), and back to the house.
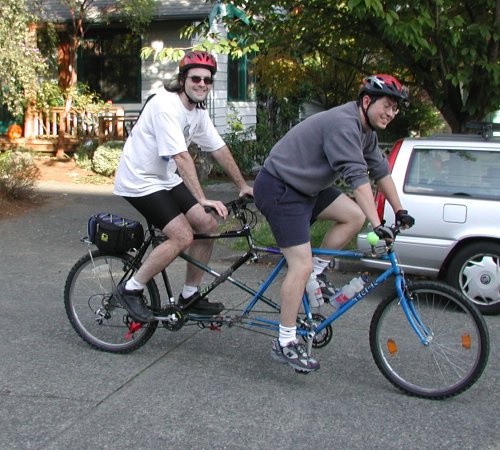
It worked!
Rigid handlebars considered harmful
Starting and balancing were a challenge. I found that I had to verbally
communicate every turn. Otherwise, I'd lean left and start to steer left,
and Dick would lean right to balance us before he knew what I was planning.
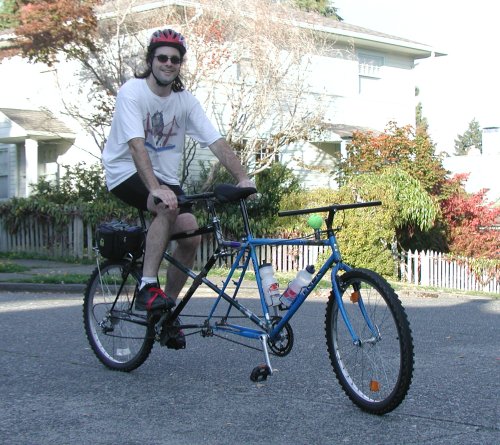
My brother-in-law Rick joined me for a couple slightly longer test rides, and suggested that both the starting and balancing problems were due to the front rigid handlebars. We realized that the stoker in the front had neither visual nor tactile balance cues about what the captain was up to. Rick suggested putting the handlebars into the steering tube, where he could feel my control inputs. About thirty seconds with a 6mm wrench got the bars out of the rigid stem and into the front steering stem (the one with the lever plate welded on, mounted in the front fork). The next ride went much better. That left the exposed rigid steewith a tennis ball to protect the front rider's equipment. More than once as we were learning to stop smoothly, Chase said "Thank you, Mr. Wilson!"
Riding with Rick also exposed the spring-loaded idler pulley problem described above.
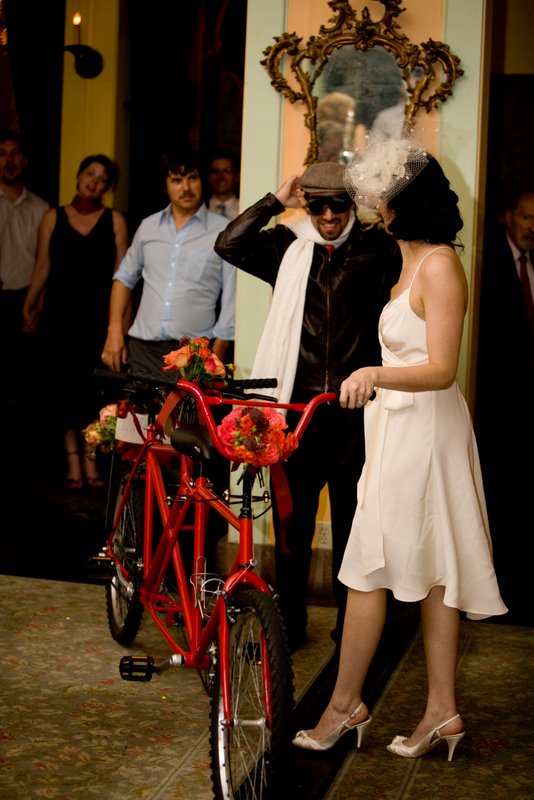
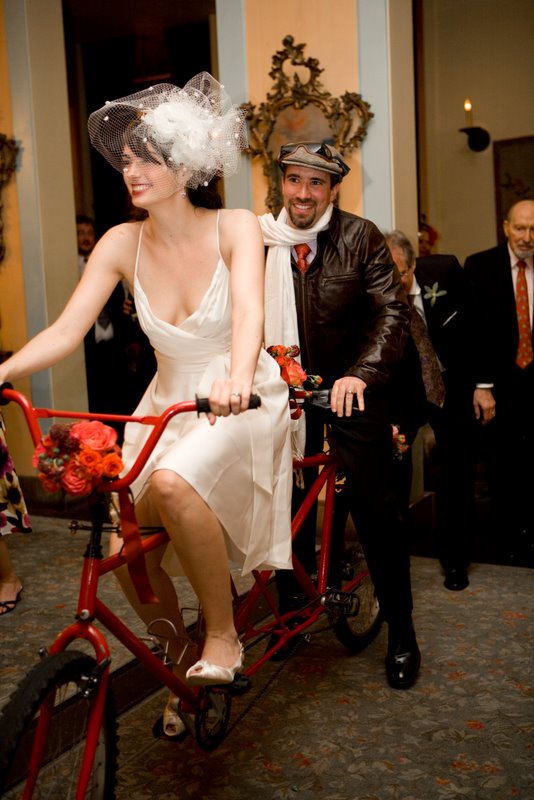
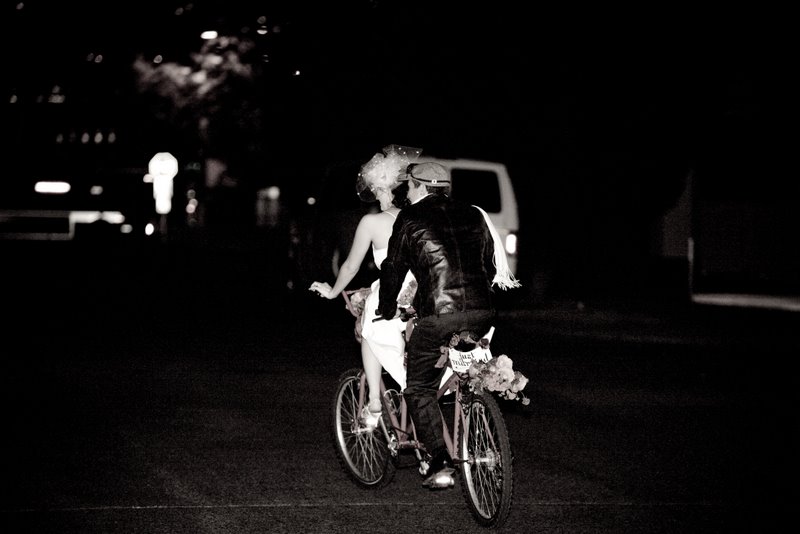
We got a lot of great looks. A neighbor pointed out that we appeared to be missing a rider, and I replied "we're looking for a volunteer!" No takers.
No cassette at Recycled Cycles, either. But a block after we left the store, the sync chain fell off. It turns out that the front bottom bracket had disintegrated, spilling ball bearings into the street (thanks again, Dr. Doofus!). The rear steering paid off: we simply looped the chain over Mr. Wilson, and rode away, the captain still coupled directly to the drive wheel.
A later trip to Recycled Cycles yielded a healthy bottom bracket; with a new store-brand cassette, the bike was back in business. I also salvaged a chrome rack with an elegant "rust" patina from the free rack, and added toe clips to the captain's pedals.
Stops were a little abrupt at first -- if the passenger steps off before the bike stops, the brakes suddenly have twice the effect, and the bike stops more suddenly. ("Thanks, Mr. Wilson!")
Starts are still a bit of a challenge. The most successful approach we found was to have the stoker step on and ride normally while the captain runs on the pavement. Once we have enough speed to establish balance, the captain leaps onto his seat, feet floating untethered. Finally, the captain watches his pedals long enough to join the rhythm. It's clumsy, but it was the best we came up with.
A less-successful approach was to have the stoker provide an initial burst, then stop pedaling so the captain can step onto the bike on a pedal. This didn't work as well for two reasons: First, if the bike is pointed up hill, that first burst of speed doesn't last long enough to maintain balance, and suddenly you're stopping again. Mr. Wilson suggested that we avoid approaches that produce unexpected stops. Second, the captain still has to look at the pedals to figure out where to stand, because of the non-1:1 ratio of the sync chain.
Chase found turns a little disconcerting, because of the need to lean in when not in control. I still think that the turning stoker handlebars made this more tolerable than it was with rigid bars.
We found that having our feet coupled was unexpectedly tricky. We are used to the freedom to coast or backpedal whenever we like, but it's quite alarming to suddenly work against the other rider. We practiced verbally coordinating coasting.
In summary, though, apparently Chase liked the bike enough to want to try riding it from the Captain's seat. That's a good sign.
| price | parts | where |
|---|---|---|
| $80 | Abused Trek 820: frame, fork, headset, derailleurs, brakes | craigslist |
| $20 | Two new chains | Recycled Cycles |
| $20 | New cables | Recycled Cycles |
| $70 | Used BBs, stem, crankset, headset | Recycled Cycles |
| $12 | New 7-speed cassette | Performance |
| $28 | MM-4 rod-end bearings | Wicks Aircraft Supply |
| $24 | Steel rod, bar & hardware for remote steering | Tacoma Screw, Home Depot |
| $0 | Salvaged crankset | Wright Bros. Cyclery |
| $0 | Salvaged chain | Recycled Cycles free rack |
| $0 | Salvaged stem | free rack |
| $0 | Salvaged handlebars | free rack |
| $0 | Salvaged seat | free rack |
| $0 | Salvaged frames (4) | free rack |
| $80 | Welder rental and consumables | Central Welding |
| price | parts | where |
|---|---|---|
| $20 | Hole saws. The steel discs are still wedged into both. | home depot |
| $10 | Chain tool | Recycled Cycles |
| $15 | Crank puller & splined BB tool | Wright Bros. Cyclery |
| $20 | Welding gloves, cleaning brushes | Harbor freight |